View your records
Steps
1. Open Records
Tap Records at the bottom of the screen.
You should see: Medical records, newest first, with filter chips above the list.
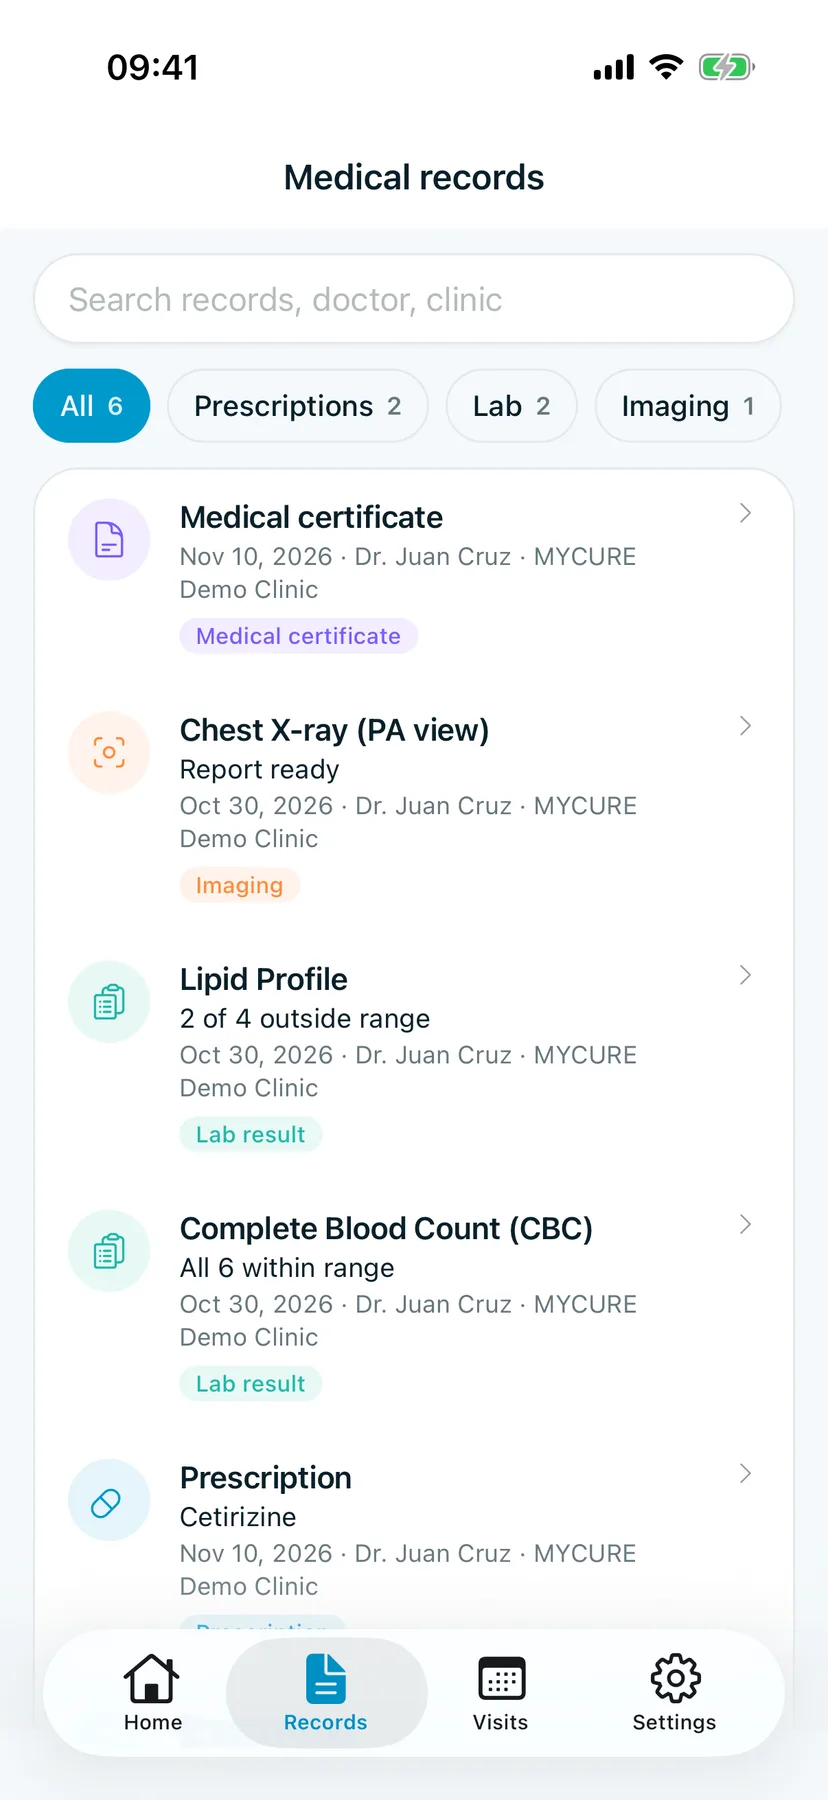
2. Filter or search
Tap a chip to show one kind of record: Prescriptions, Lab or Imaging. Tap it again to show everything. To find something specific, type a medicine, doctor or clinic into Search records, doctor, clinic.
You should see: only the records of the kind you picked.
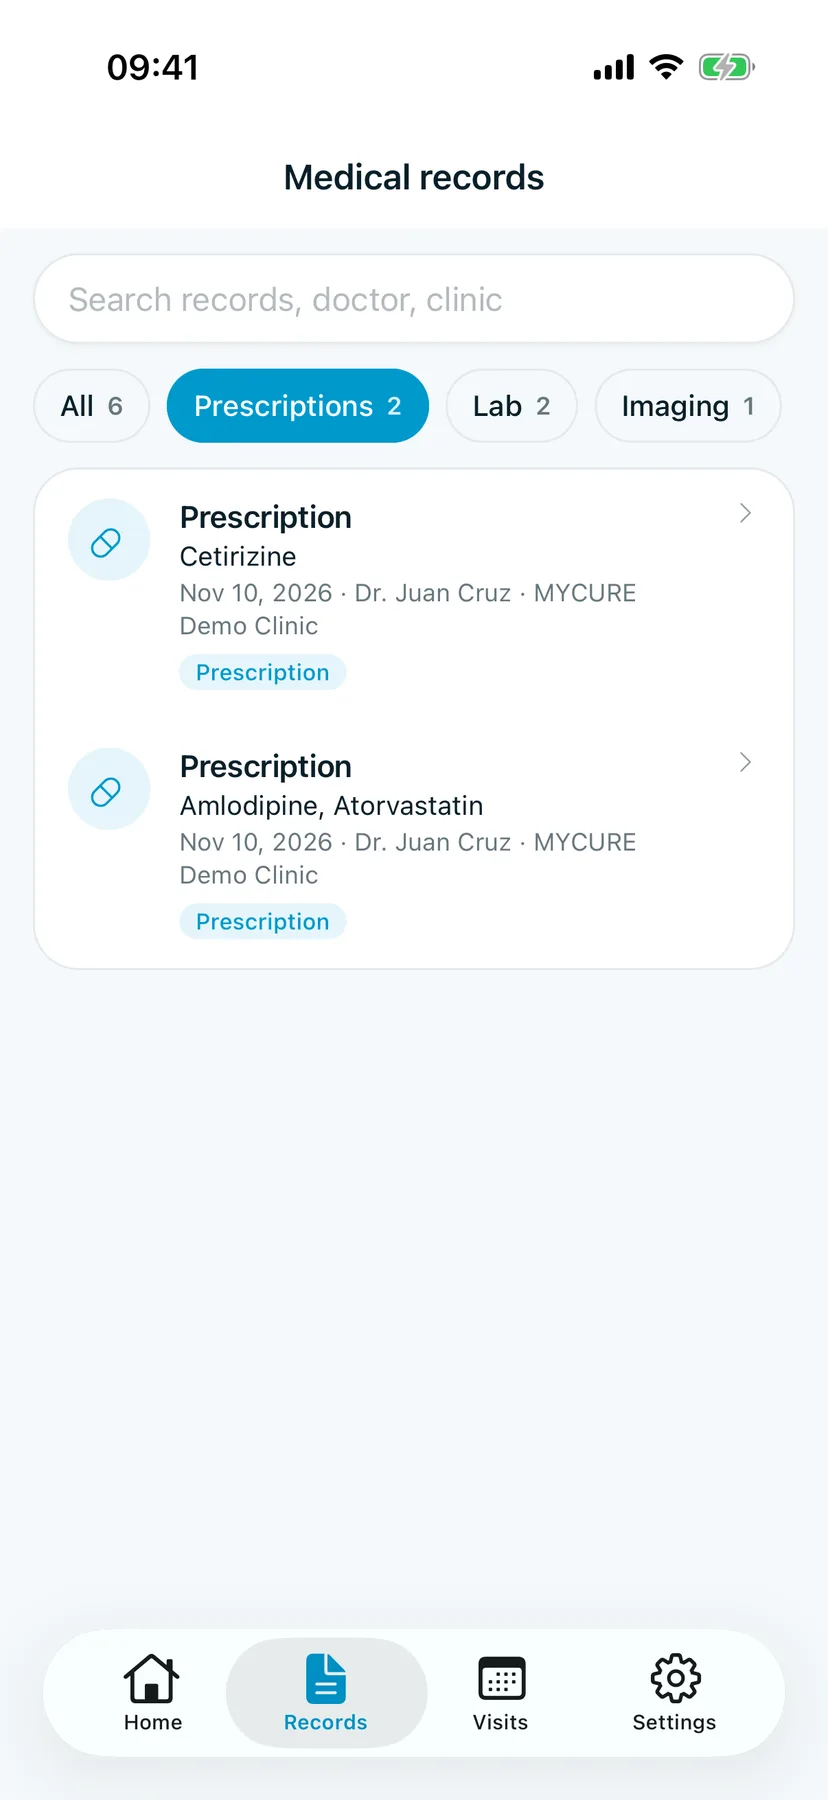
3. Open a prescription
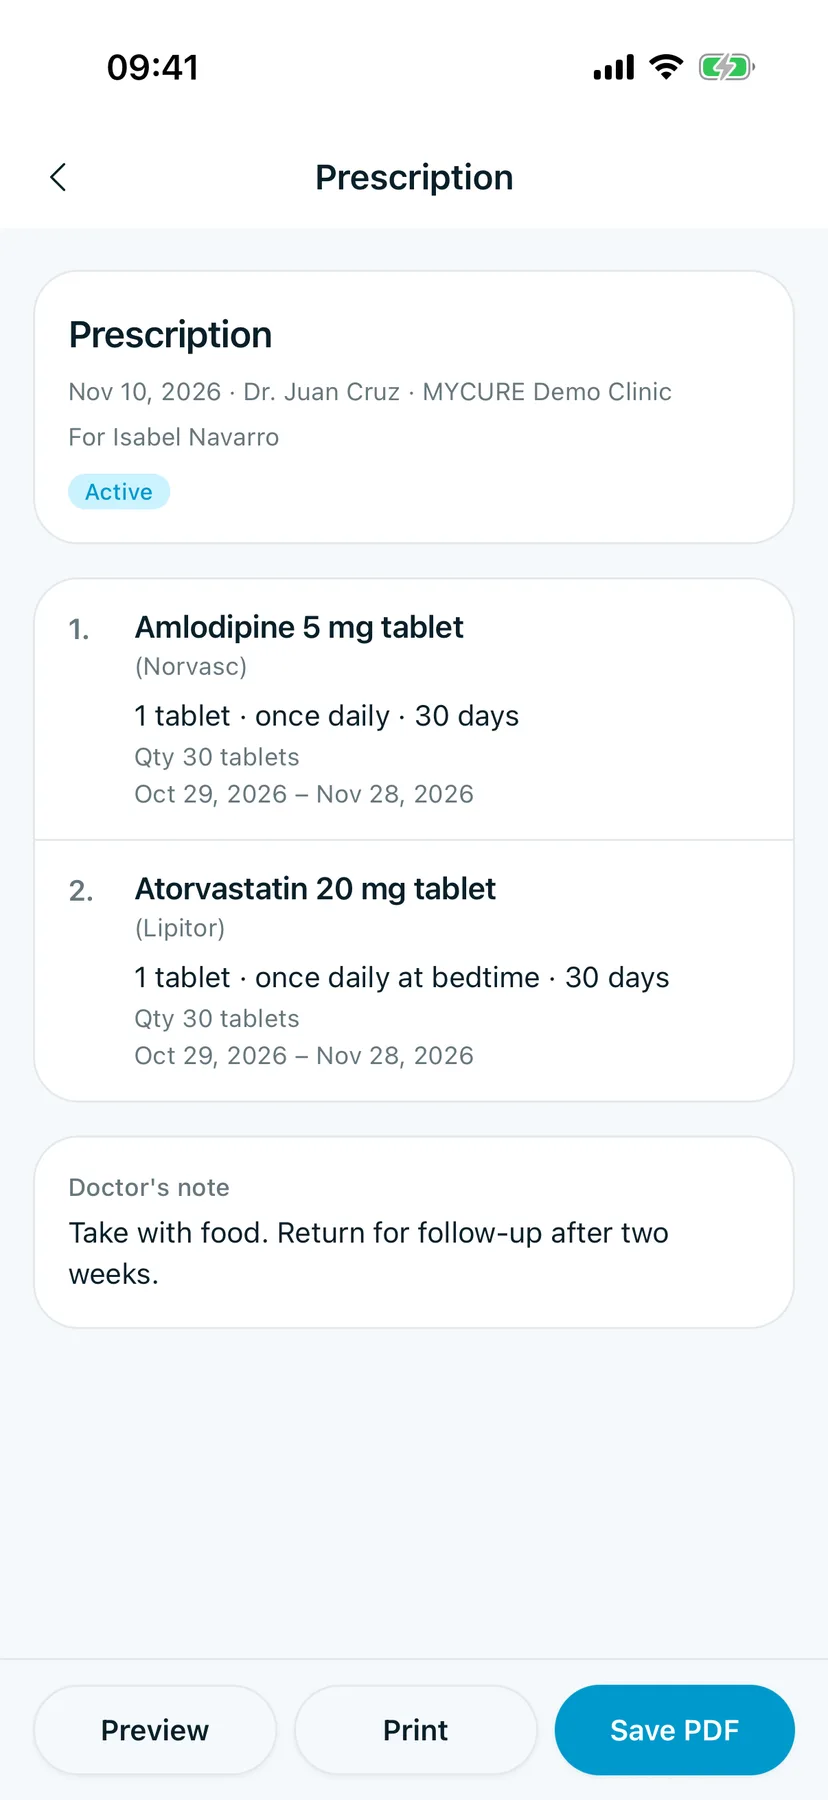
Tap a prescription.
You should see: each medicine with its strength, how to take it, how many and for how long, and the doctor's note. Active means you're still within its dates; Ended means the course is over.
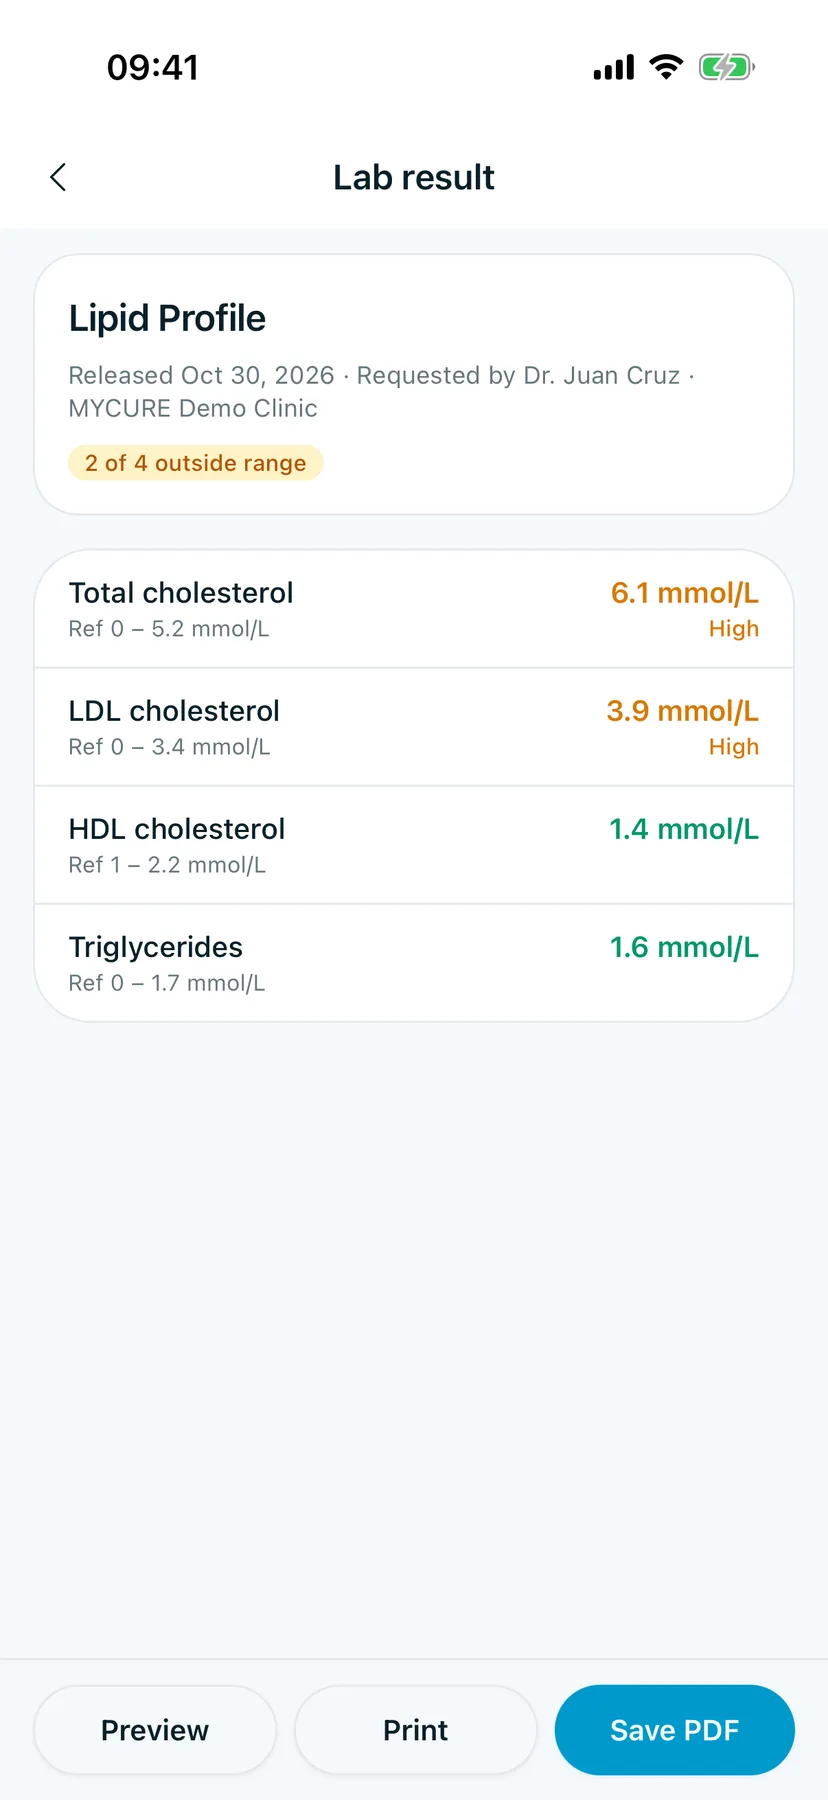
4. Open a lab result
Go back, tap Lab, then tap a result.
You should see: each test with your value on the right and its normal range under the name. The badge at the top sums it up, for example All 6 within range.
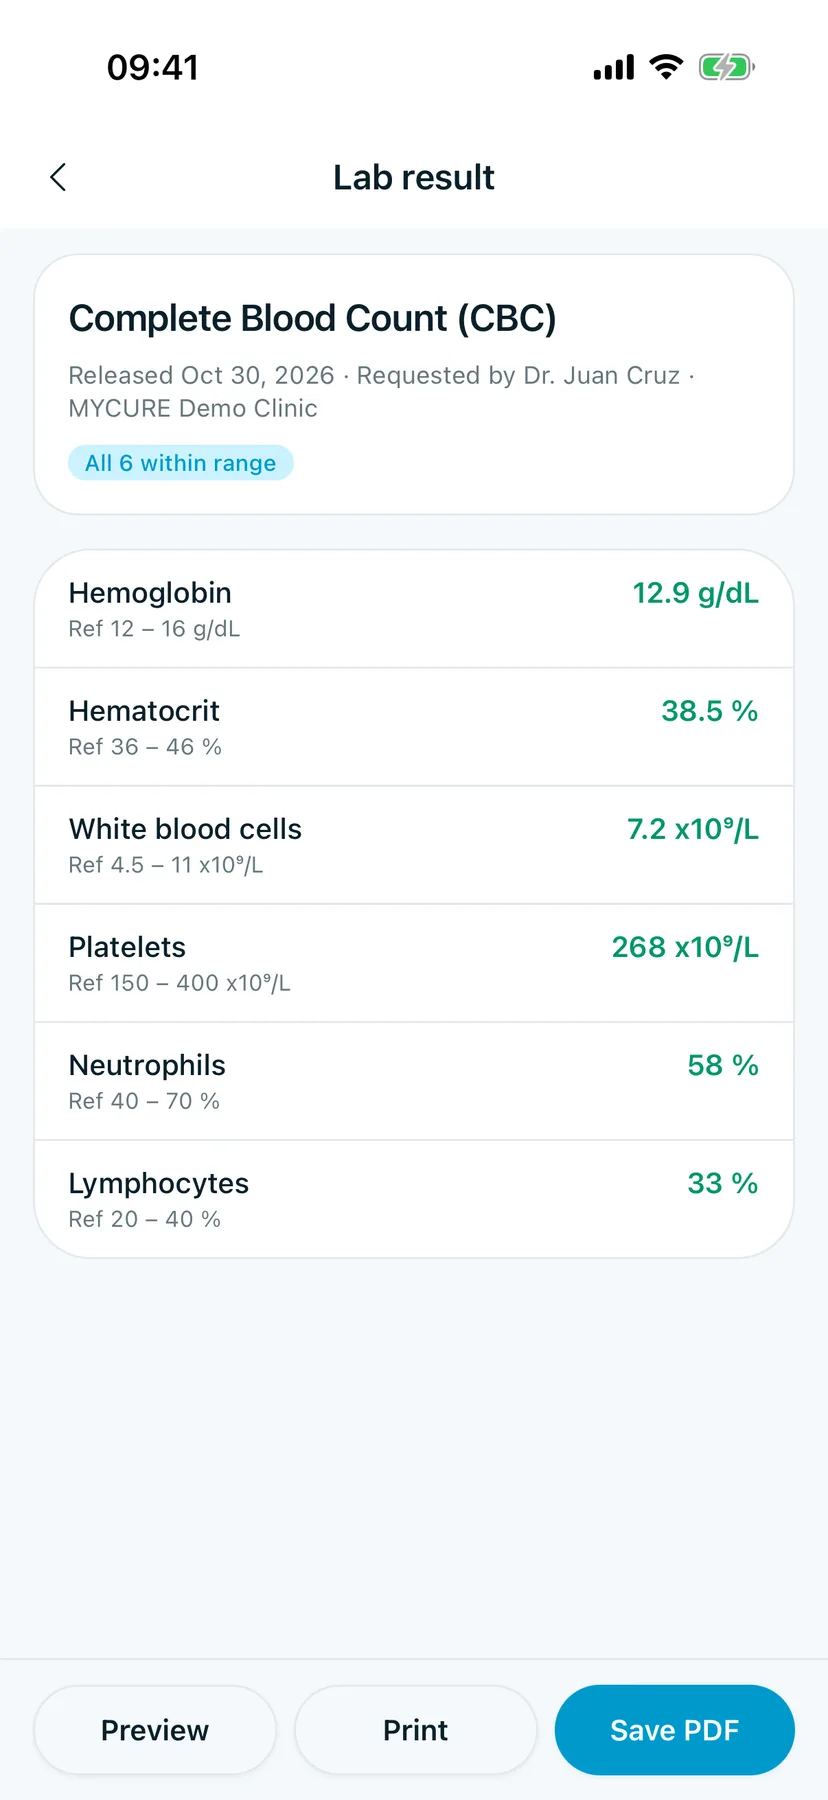
Values outside the normal range are shown in orange and marked High or Low, so you know what to ask your doctor about.
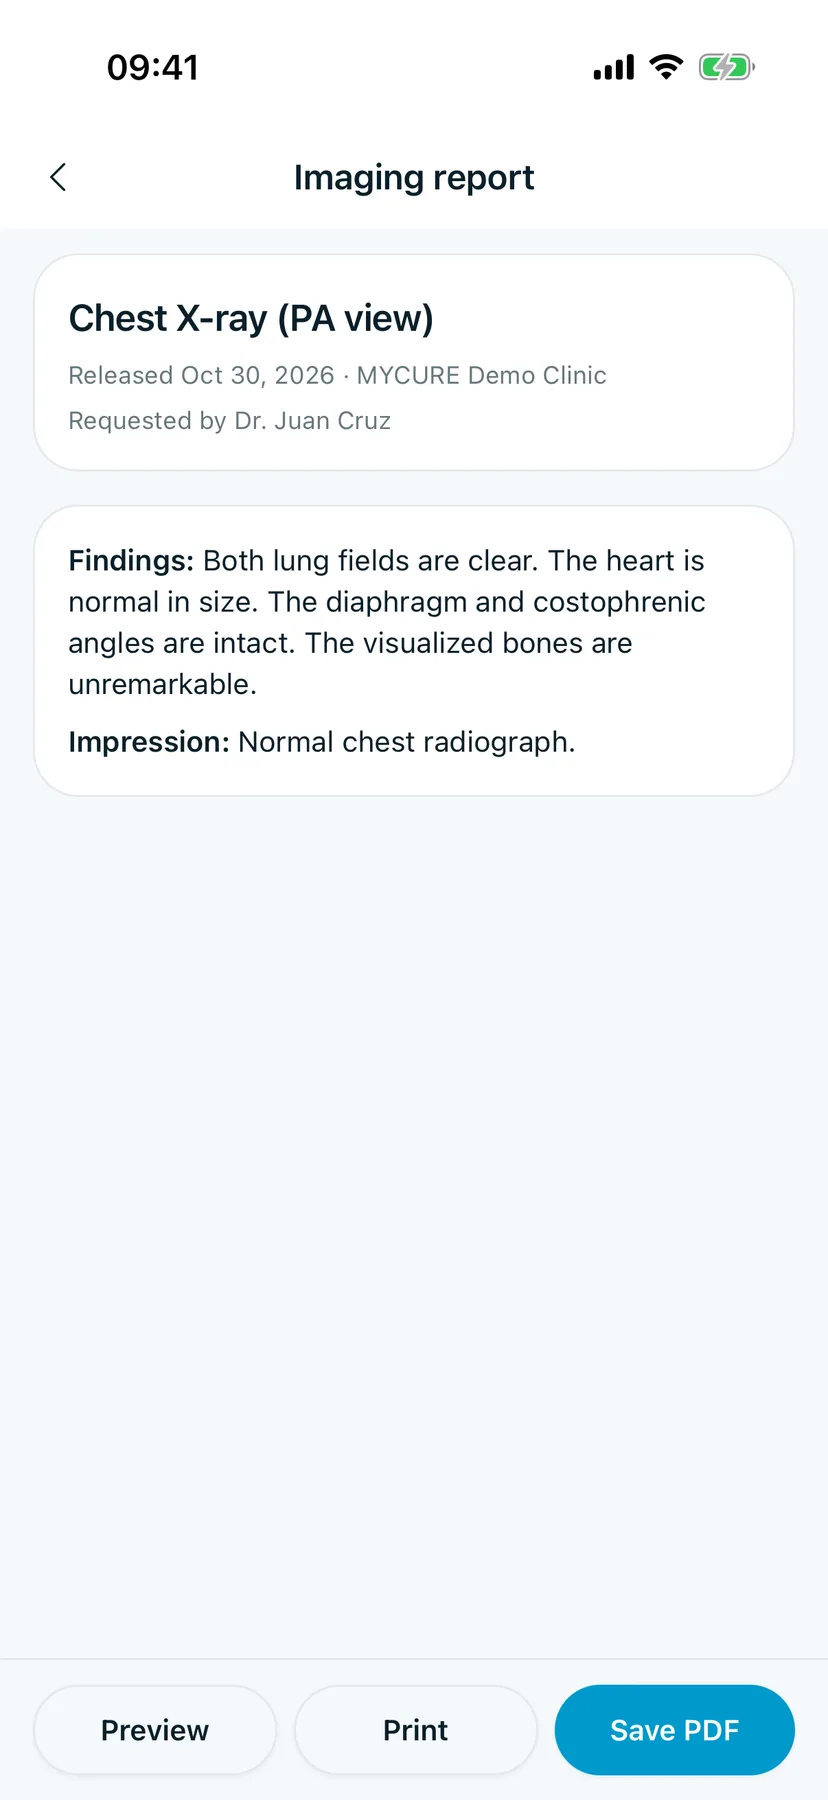
5. Open an imaging report
Go back, tap Imaging, then tap a report.
You should see: the radiologist's Findings and Impression, and who requested it.
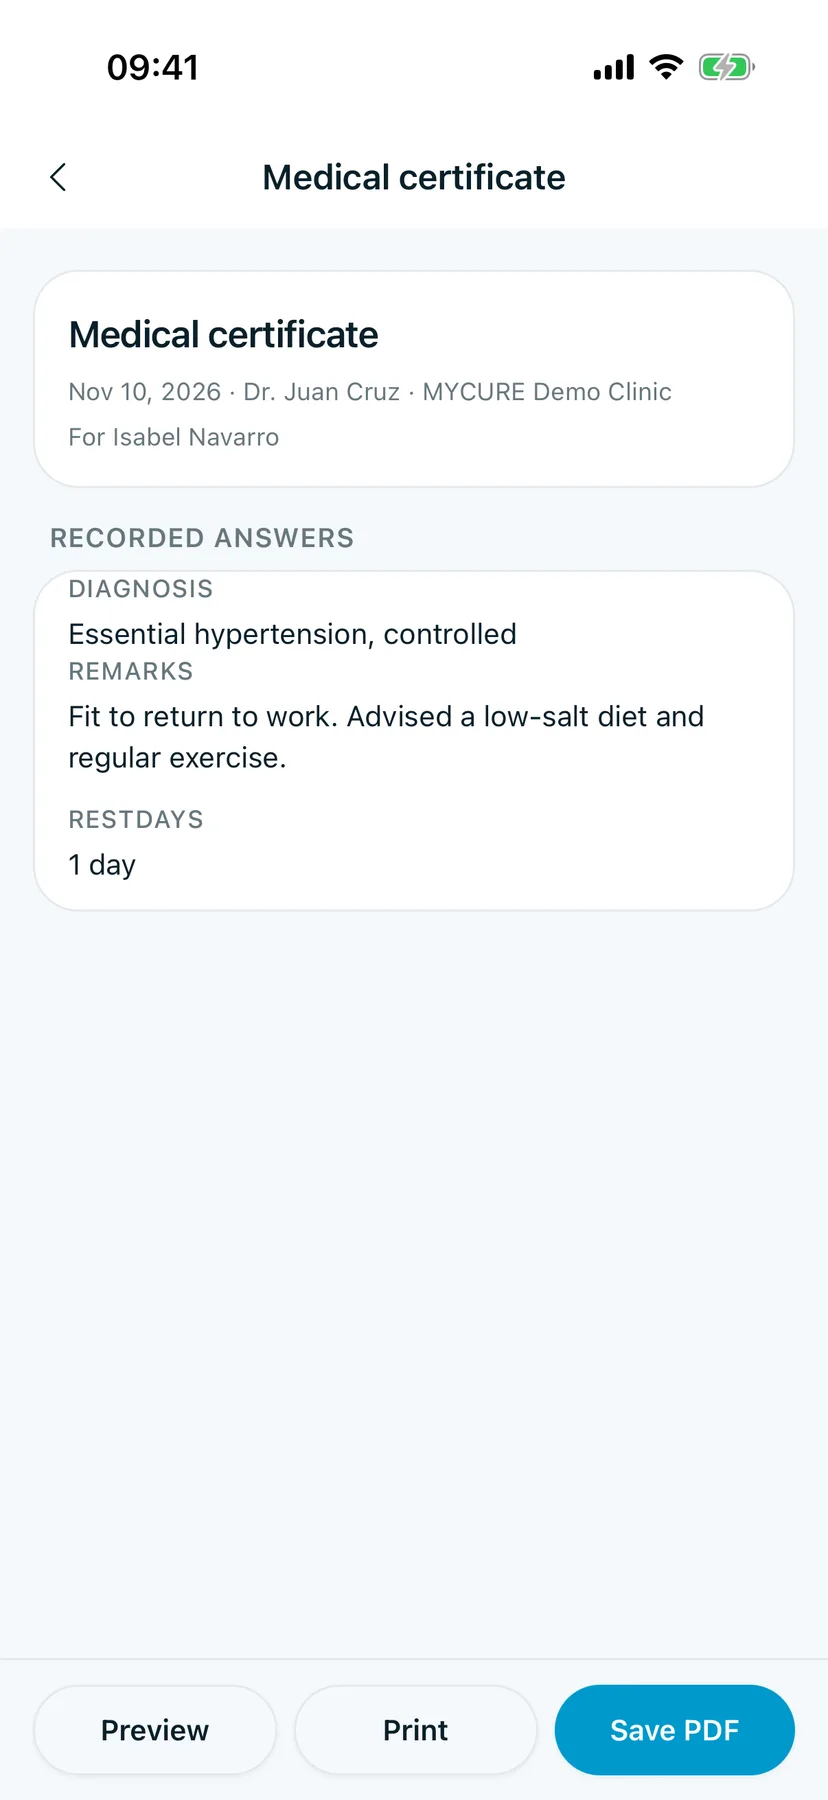
6. Open a certificate
Medical certificates are in the same list. Tap one to read it.
You should see: the certificate's details, the date and the issuing doctor.
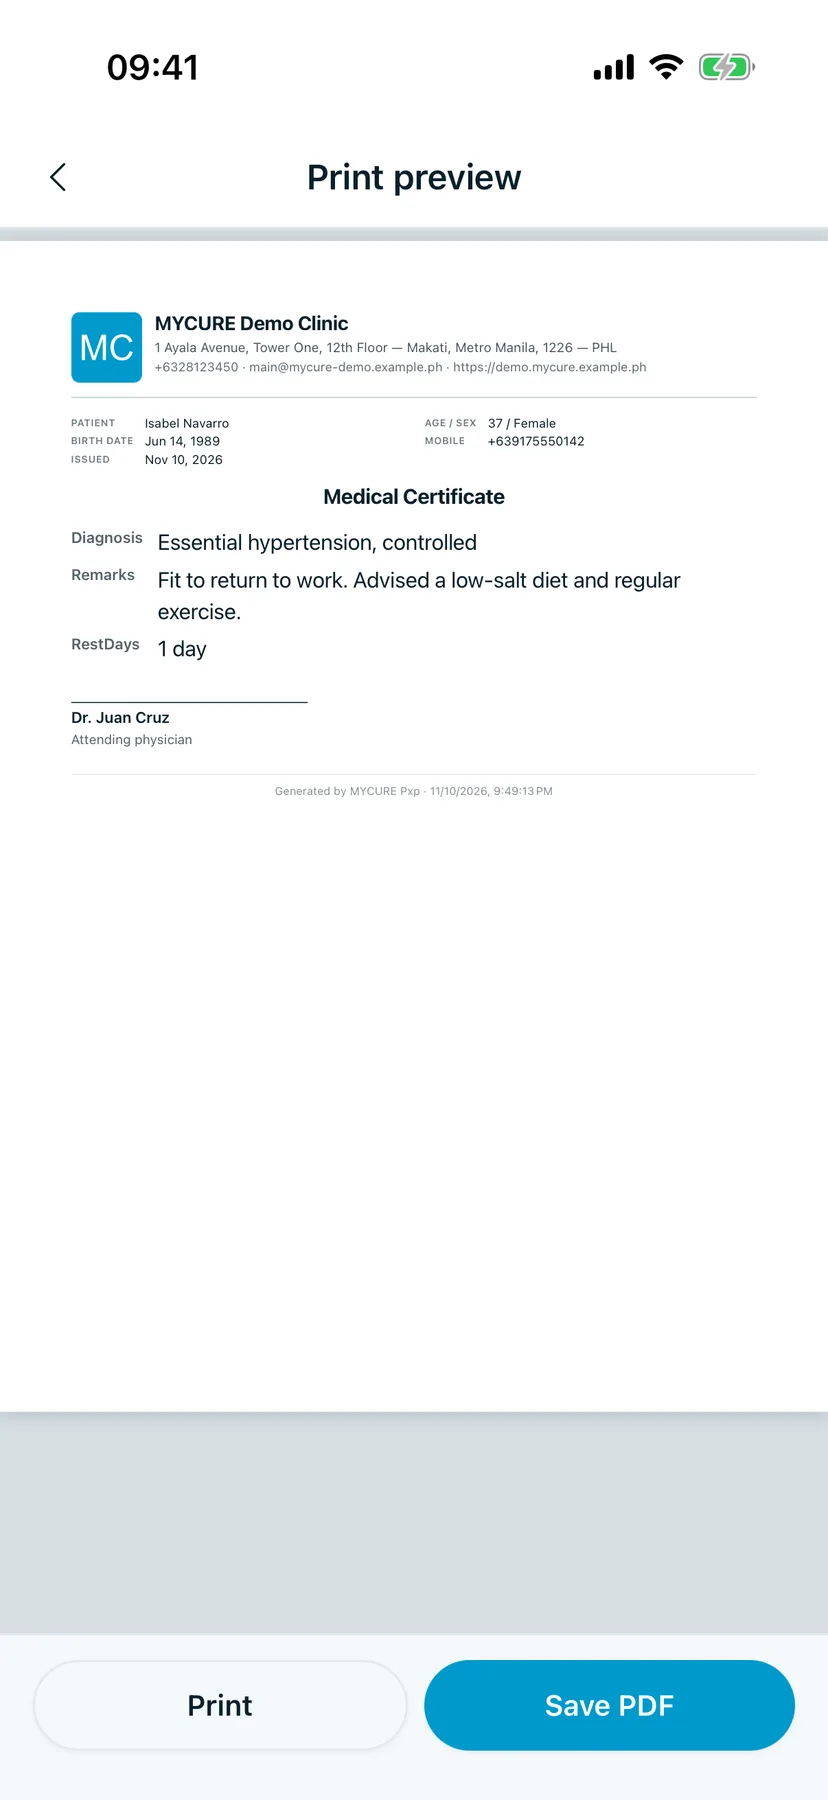
7. Preview, print or save a copy
At the bottom of any record:
- Preview shows the record laid out as a printed page.
- Print sends it to a printer.
- Save PDF saves or shares a PDF, for example to send to another doctor.
You should see: the printed layout of your record.
Tips
Pull to refresh
Pull down on the list to check for records your clinic released since you opened the app.
Good to know
The colours on lab results compare your value with the range the lab gave. They are not a diagnosis. Talk to your doctor about any result.